Follow the steps below to adjust and align your garage door safety sensors.
1. Adjust the Sensor Bracket
Ensure that the curved arms of the sensor bracket are secured around the edge of the door track. Snap it back into place if needed so that the bracket is flush against the track. If the sensor brackets are mounted to the wall, ensure that they are not loose and straight.
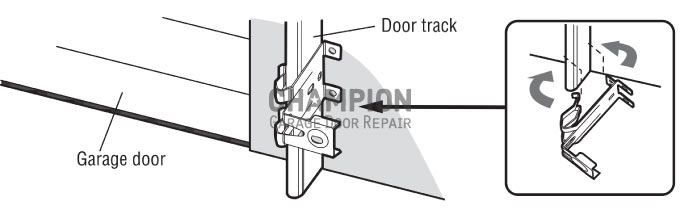
2. Adjust the Track
Adjust the door’s track if necessary and tighten the jamb bracket screws that secure it to the garage frame.
3. Loosen the Sensor
If the sensor is secured to its bracket with a wing nut, loosen the wing nut.
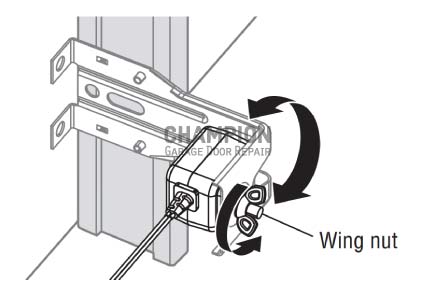
4. Adjust the Sensor
Position the sensors so that they both point straight towards each other. Do this by adjusting the sensors until both LEDs are on and not blinking. Then tighten the wing nut to secure the sensor in the correct position.
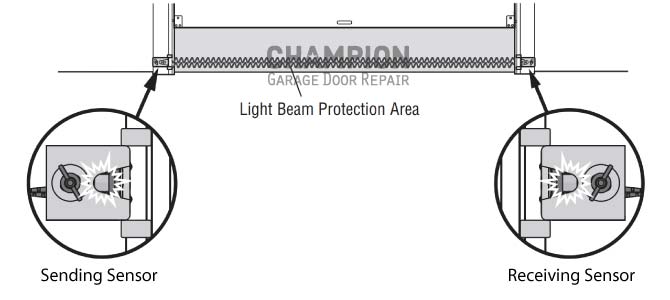
5. Test the Alignment
Test the garage door. You can ensure that the sensors are properly aligned by nudging one of the sensors with your hand while the door is closing.
If your garage door sensors are still not working after performing these alignment steps, there could be another reason why they don’t work. Learn more here about what can cause safety sensors to malfunction and how to fix the problem. Otherwise, consult a licensed garage door repair company.


