Hiring a licensed garage door repair professional can be costly, and garage door maintenance is not cheap unless you can perform repairs yourself. Here, we’ll show you how to troubleshoot and repair garage door problems that require basic to advanced technical abilities.
While some repairs are practical and can be completed in a few steps, others are more complex and might require you to use tools, follow intricate steps, and take safety precautions.
Diagnose Your Garage Door Problem
If you have a garage door opener in your garage, your opener will communicate an error code every time something goes wrong. Read the error code from the opener and refer to the owner’s manual which will direct you in the right path.
Properly diagnosing your garage door is an important step that can save you valuable time and money on unnecessary replacement parts.
Take the time to inspect your garage door for any signs of abnormality. This could be misalignment, garage door opens too slow or closes too fast, binding or sticking, bent or damages door sections, broken or misplaced parts such as rollers, springs, hinges, brackets, or cables.
Align and Adjust Your Garage Door Sensors
If your electric garage door won’t close, it may be just a matter of cleaning or adjusting the opener’s sensors. First, get a dry wash cloth and clean both sensors’ lenses, then test the door. If it doesn’t work, align the sensors by adjusting the sensor’s wing nut and bracket.
Replace Your Garage Door Bottom Seal
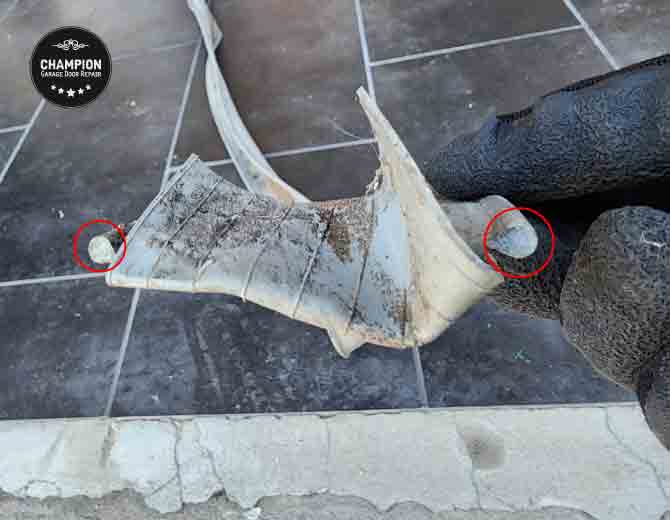
A worn garage door seal can result in rain water and critters getting into your garage. Before you remove your worn garage door bottom seal, make sure that your seal’s channel is up-to-date. Older garage doors may have channels designed for seals that are no longer in use. An up-to-date channel will have two T-shape grooves. Obsolete bottom seal channels usually have a single channel or two O-shape grooves.
Once you replaced your obsolete bottom seal channel or verified that it is up-to-date, you can install a new seal by following these steps:
- Raise your garage door half way. You can secure it place with vise grips if you don’t use a garage door opener.
- Pull the old bottom seal out from either left or right side.
- Remove debris and clean the channel’s grooves using a brush or a broom.
- To make the replacement process easier, you can spry oil inside the channel’s groove.
- Install your new garage door bottom seal by having one person feeding the channel and the other pulling the seal.
- Trim any access seal using a utility knife.
There may be cases where your newly installed bottom seal causing access pressure on your garage door opener, resulting in your garage door bouncing back up once it hits the floor. If this is the case, you’ll need to set up your garage door opener down travel so that the door won’t pressure the seal so hard when it’s closing.
Adjust and Recalibrate Your Garage Door Opener Force
Your garage door opener force may lose calibration due to weather conditions, normal wear and tear, worn garage door springs, newly installed springs, or adjustments to the door’s torsion system. If the opener force isn’t calibrated properly, it can cause your garage door to not open or close correctly, resulting in erratic behavior.
If you have an older garage door opener, you’ll need to adjust the force manually. There are two screws on the opener head, usually marked with “kg” and an up or down arrow. The screw with the down arrow adjusts the closing force, while the screw with the up arrow adjusts the opening force.
If your garage door opener is having trouble opening in cold weather or in general, turn the screw with the up arrow clockwise. If your garage door opener is having trouble closing, turn the screw with the down arrow clockwise.
In newer garage door opener models, the force is set and adjusted automatically when you set up the opener limits, so you’ll have to redo the limits. Typically, there are two buttons on the opener head with arrow markings. The up arrow sets the opening travel, and the down arrow sets the closing travel. Since each opener has a different programming process, it’s best to refer to your opener’s owner manual for exact programming instructions.
If you don’t have the owner’s manual, you can download it from your opener’s manufacturer website. Use the following links and search for your opener model number to find and download your owner’s manual: LiftMaster, Chamberlain, Genie, Marantec.
Repair Your Garage Door Cable
You may’ve noticed that your garage door is crooked, uneven, misaligned, tilted to one side, or off the tracks. This could be due to a broken garage door cable or a cable that came off the drum. Start by inspecting both cables, left and right. Look for breaks, kinks, and unraveling of the cable.
Repairing a misplaced cable or replacing a broken one requires some technical abilities, working on top of a ladder, and the right tools. In some cases, it may also require you to work with the garage door springs in order to reset the torsion assembly and balance the door.
To start with, you’ll need a 7/16 inch (11mm) 12-point wrench, a pair of vise grips, and a ladder or step stool. The main goal when fixing a garage door cable is to rewind it back on the lift cable drum, ensuring that both sides of the door are even.
Carefully lift the garage door to a position where both sides are even and aligned with each other, then secure the door in its position with a pair of vise grips. Proceed by removing the cable from the garage door’s bottom bracket, straighten it, and start winding it back around the drum’s groove. Once it’s done, reattach the cable loop back to the bottom bracket lip.
Give Your Garage Door a Tune-Up and Safety Inspection
It’s not a question of if, it’s a question of when. Over time and with constant use, your garage door will start making sounds and noises. This could be due to metal parts rubbing against each other and increased friction when the garage door goes up and down.
You can eliminate unwanted noises by regularly maintaining and lubricating your garage door. You can use any product that designed to act as a lubricate. Avoid rust removers and penetrating oils. Lubricate the moving parts only such as the door hinges and rollers. Do not lubricate the tracks, drums, or cables.
To ensure your garage door’s safety, make sure that all the bolts, screws, and nuts are tight. Ensure that all fixtures are properly secured. Inspect for any abnormalities, breaks, or fractures in the metal parts.
Take Proper Safety Precautions During Repairs
Taking proper precautionary measures when working on your garage door ensures your safety, prevents accidents, and helps avoid injuries. It protects not only yourself but also those around you. You can better promote safety by following the steps below:
- Pay attention to where you place your hands to avoid pinching your fingers, and use protective gloves.
- Be mindful when working with electrical components.
- Use proper tools. For example, do not try to wind or unwind springs with a screwdriver.
- Secure your ladder in place.
- Clear any items that may be in your way before commencing the repair work.
- Do not tamper with the garage door springs unless you are trained.
How Much Does It Cost to Have Your Garage Door Repaired by a Professional?
While some tasks may be easy to handle, others may be more complex and precarious. If you’re not sure how to fix your garage door, you may want to have it looked at by a licensed garage door repair company. The cost of repairing a garage door depends on your location, type of door, and what exactly needs to be done. In Southern California and Orange County, for example, for a standard metal garage door, you can expect to pay anywhere from $150 to $800 for basic maintenance and repairs done by a licensed professional.


